
Plane a Door Bottom

If you’re struggling with a stuck door, learning how to plane the bottom of the door is essential.
This expert guide will take you through the steps, from pinpointing the problem to executing precise planing for a smooth swing.

Build your door today!
Get a Quote
We’ll cover tool selection, technique, and finishing touches to ensure your door functions perfectly.
How to Plane Bottom of Door - Overview
- Start by identifying where your door sticks and marking with a pencil. To avoid excess trimming, do not plane more than 1/2 inch off.
- Remove the door from its frame to plane, starting with the bottom hinge, and check for any staples or nails that could get in the way.
- Use painter’s tape to protect the areas of the door you’re not planing. After planing, sand the edges for a smooth finish, reattach the door carefully, and adjust as needed for a perfect fit.
Identifying the Problem Areas
Do you have a sticking door that’s a bit stubborn? Our door planing adventure begins by identifying the trouble spots. Open and close your door, and note where it’s sticking or causing problems with the door frame.
You might have the wrong internal door size, which would make opening and closing your door difficult.
Once these sticking points are identified, mark them with a pencil. Remember, the goal is to ensure the door fits perfectly in the frame, keeping out unwanted elements like rain, dust, and bugs.
Regarding how much to shave off, you’ll usually take some off the bottom of the door. However, be cautious not to take off more than 1/2 inch to avoid overdoing it.
Marking the areas where the door rubs and being mindful of the shave-off amount ensures a solid plan for a smoother, better-fitting door.
Removing the Door from Its Frame
Once we’ve marked our problem areas, it’s time to get down to business. The first task is to remove the door from its frame by taking out the hinge pins.
Before you unscrew the hinges, check the bottom of the door for any staples or nails that could interfere with the planing process.
The trick to removing the door is to start by unscrewing the bottom hinge first. This helps keep the door stable and protects the door edge.
Remember to hold the door firmly while unscrewing the hinges to prevent it from falling and causing damage.
After detaching the door, swiftly inspect the bottom to ensure there are no staples, nails, or other obstructions that might interfere with the planing.
Preparing the Door for Planing
With the door safely removed from its frame, we’re ready to move on to the next stage: preparing the door for planing.
This involves gathering the necessary tools and materials and applying painter’s tape to protect the door’s surface during planing.
Tools and Materials Needed
Now, let's not get too far ahead of ourselves. First, you need to make sure you have all the tools and equipment to plane your door.
The tools and materials you’ll need include:
- Hammer
- Nail set
- Pencil
- Plane
- Chisel
- Tape measure
- Screwdriver
- Workbench
- Ruler
- Carpenter’s pencil
- Carpenter’s compass
- Doorstop
- Cordless drill
Having these on hand before starting the planing process facilitates a smooth operation.
In addition to these tools, don’t forget your safety gear. Wearing eye protection, a dust mask, and ear protection while using a door plane to plane a door safeguards you from flying debris and noise.
Ensure that the working surface is plane flat for the best results.
Painter's Tape Application
When you plane the bottom of your door, remember that painter's tape is another important piece of equipment.
Painter’s tape is an essential part of the door planing process.
Applying it to the door before planing helps protect the surface and ensures a clean finish. After adhering the tape along the planing line, press down the edge to provide a good seal.
Remember, you only need to cover the surface around the area you are planing with painter’s tape. This ensures that the rest of the door remains well-protected during the process.
Also, remember to use blue painter’s tape instead of regular masking tape. It’s easier to remove and provides cleaner, sharper paint lines.
Planing Techniques for Bottom of Door
With the door prepared, we can proceed to the actual planing. You can use a few different techniques to shave off the bottom of the door, including hand planing, using a circular saw, or using a belt sander.
Your choice of tool will depend largely on the door’s condition and the level of precision needed.
Hand Planing
Hand planing is great if you need to take off less than 1/2 inch from the bottom of the door. For this job, a jointer plane at least 22 inches long is recommended, giving you more control and a smoother finish.
However, consider using an electric planer if you require a faster and more efficient approach.
When setting the blade in a block plane, follow these steps:
- Adjust the blade depth of your electric hand planer for the amount of material you want to remove.
- Set the angle of the plane for efficient shaving.
- Give it a test run by planing side-to-side until you get the fit you want.
- Always start from the outside edge and work toward the centre, using steady, light pressure to avoid damaging the wood.
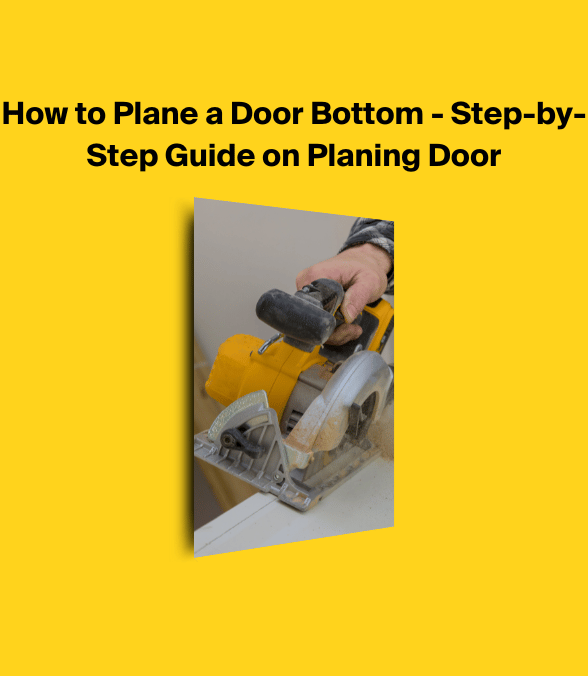
Circular Saw Method
If you prefer to use a circular saw for door planing, choosing the right blade is important. A blade with 12 teeth is recommended, but for a smoother finish, you can opt for one with 40 teeth.
This method is very popular for homeowners when they cut down a composite door that has warped or is too big, as the saw is better equipped to get through the material compared to other methods.
Before you start cutting, follow these steps:
- Mark the door for the cut and use a straight edge as a guide.
- Adjust the depth setting on the circular saw.
- Start cutting along the guide.
- Always adjust the depth setting, particularly when using a cordless saw.
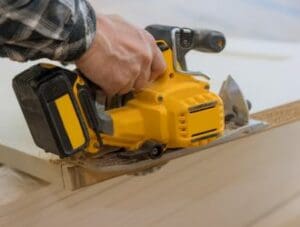
Belt Sander Option
A belt sander can be your best friend if you have a door that only sticks in one spot.
Using a handheld belt sander, you can start with medium-grit sandpaper, initially applying steady but light pressure, then pressing harder on rough areas.
Safety is paramount when using a belt sander. Here are some important safety precautions to follow:
- Always wear ear protection, a dust mask, goggles, or a face shield.
- Unplug the tool before changing the belt or emptying the dust bag.
- Ensure the sander is switched off and unplugged when making any adjustments.
Sanding and Finishing the Planed Edge
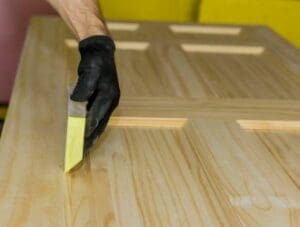
After all that planing, your door should be looking pretty good. But we’re not quite done yet.
The next step is to sand and finish the planed edge to make your door look professional.
When sanding, start with 180-grit sandpaper.
If you’re planning on applying a stain or dye, you can switch to 220 grit to achieve a finer finish.
The aim is to ensure the door edge looks nice and smooth, just like a pro job, while maintaining the natural wood grain.
Not only should this be done after planing your door, but sanding and finishing after other door changes can also help achieve a seamless finish.
For example, if you have stripped door paint in an effort to get the natural wood look back, you should also look to sand it afterwards.
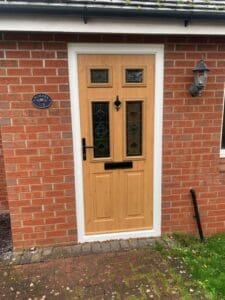
Reattaching and Testing the Door
At this point, you will have done most of the work on the bottom surface of your door, so it's time to put everything back together.
With a beautifully planed and sanded door, we can now reattach it to its frame. Here’s how:
- Start by tidying up the screw holes with a sharp chisel.
- Use shims to hold the door in place.
- As you reattach the door, ensure it’s hung correctly by transferring the marks.
After reattaching the door, test it. Open and close the door to check if it’s swinging properly. If it’s sticking or not working smoothly, it might need some minor adjustments.
Finally, verify that the gaps around the top and sides of the door jamb are all the same size, ensuring a stable surface for proper installation.
By doing so, you’ll create a straight line along the door jamb, which is essential for a seamless fit and door jamb size.
Troubleshooting and Adjustments
Despite careful planning and execution, some issues may arise after you plane a door, especially when it comes to a bedroom door.
For instance, you might notice drafts coming through any gaps left after trimming the trim doors, which could result from too much wood being removed.
To fix drafts, consider applying weatherstripping or self-adhesive weatherproof strips for draught-proofing. It’s also a good idea to replace your weatherstripping every few years to ensure it’s effectively keeping drafts out.
And if you notice any swelling after planing, consider replacing worn weatherstrips, touching up the paint, or even replacing the entire door if the swelling is severe.
If you want to know more about painting a composite door, you can see our guide.
Working with Different Door Types
Obviously, not every door is the same, as you will see by looking at your neighbour's doors or even the different doors in your home.
Various door types necessitate different approaches. For instance, veneered doors require a sharp chisel or plane to avoid damaging the thin veneer.
When working with hollow core doors, a hand planer can be used, but care should be taken to avoid removing too much material.
No matter the door type, always sand the edges after planing and use painter’s tape to touch up any imperfections. By selecting the right tools and methods for the door type, you'll ensure a professional finish.
Plane Door Bottom - Our Thoughts
Now that we’ve walked you through the process of planing a door bottom, we hope you can follow this guide to plane your own door.
We've covered everything from identifying the problem areas and preparing the door for planing to selecting the right planing technique and making necessary adjustments.
With a little patience and the right tools, you’re now equipped to tackle that sticking door and transform it into a smooth, perfectly fitting door.
If you continue to have issues with your door, it might be time to look for a new door that is more equipped for your home.
However, before doing this, you should look into new front door costs to see what price you may be paying.
Frequently Asked Questions
How do you plane down the bottom of a door?
To plane down the bottom of a door, use a door plane by moving it from the edges towards the middle to shave the door down, resulting in a smoother surface.
The more you plane, the shorter or thinner the door becomes.
Can you shave the bottom of a door?
Yes, you can shave the bottom of a door using a hand plane or a circular saw. Measure and mark the cutting line accurately for a smooth and controlled shave.
What tool is used to shave the bottom of a door?
You can use a door plane to shave the bottom of a door. It's a handheld device that can smooth and shorten the door.
No need to worry; it's a simple and effective tool for this job!
How much material can I safely remove from the bottom of a door?
You should not remove more than 1/2 inch from the bottom of a door, as removing too much could lead to the door not fitting correctly.
Can I use a circular saw to plane a door?
Yes, you can use a circular saw to plane a door. Just use the right blade and adjust the saw's depth setting for precision.