Are you tired of staring at outdated UPVC doors and windows? Are you ready to breathe new life into your home? You’ve come to the right place.
UPVC surfaces have long been praised for their durability and low maintenance, but they can lose their lustre over time.
Thankfully, there’s a solution that doesn’t involve replacing your entire window or door:
Painting UPVC surfaces is an effective and budget-friendly way to refresh your home's appearance, increase its value, and extend the life of your windows and doors.
If you want to paint UPVC doors or windows, we’ll walk you through everything you need to know about painting UPVC surfaces, from choosing the right paint and prepping your workspace to applying the perfect finish.
Let’s dive in and transform those tired UPVC window frames and surfaces into something you can be proud of!
If you want new windows instead of painting, see how much new windows cost in our guide.
How to Paint UPVC Doors and Windows Overview
- Painting UPVC surfaces offers a range of benefits and requires essential tools, materials, and preparation techniques.
- Before you paint UPVC doors, properly clean and lightly sand the surface before applying primer for even adhesion.
- Regular cleaning with mild detergent is recommended to maintain painted UPVC surfaces over time.
Painting UPVC Surfaces - Is it a good Idea?
Painting UPVC doors, including the decision to paint UPVC windows, is more than just a cosmetic upgrade; it’s an investment in your home.
A fresh coat of paint can significantly improve the curb appeal of your property, which, in turn, can increase its market value.
Moreover, painting UPVC doors and windows yourself can extend the lifespan of your uPVC doors and newly painted windows, thanks to the protective layer that paint provides against weathering and UV damage.
But the benefits don’t stop there. Painting uPVC window frames and door surfaces also allows you to customise the look of your home, giving it a unique and personal touch.
Gone are the days of being limited to white or brown UPVC windows and doors.
There’s a vast array of colours and finishes available to suit your taste and style, even for window and door frames, including plastic window frames and window furniture.
So, whether you want to turn your white UPVC door grey or add a pop of colour to your front door, painting UPVC surfaces is the perfect way to make your home stand out and reflect your personality.
Painting UPVC Window Frames Essential Tools and Materials
You should gather the necessary tools and materials before starting your UPVC painting project to guarantee a successful outcome.
First and foremost, you’ll need to choose the right paint specifically designed for UPVC surfaces. These paints are formulated to adhere well to plastic and resist UV/solar bleaching, ensuring a long-lasting and durable finish.
Following that, your workspace should be readied. Here are some steps to prepare your workspace:
- Protect the edges and glass of your windows and doors with masking tape.
- Cover nearby surfaces with drop cloths to prevent paint spills or splatters.
- Ensure your workspace has proper ventilation, as paint fumes can be harmful if inhaled in an enclosed space.
Once the right paint is chosen and your workspace is prepared, you’re on the path to transforming your UPVC surfaces.
Choosing the Right Paint for UPVC Doors
Choosing the right paint is crucial for the success of a UPVC painting project. Opt for UPVC-specific or exterior paints that adhere well to plastic and resist UV/solar bleaching.
Many paint manufacturers, such as Wethertex, Rust-Oleum, Zinsser, and Bradite, offer a range of colours and finishes specifically formulated for UPVC surfaces.
When choosing your paint, consider the desired finish (gloss, matt, or satin), colour options, and product compatibility with interior or exterior use.
Always follow the manufacturer’s instructions when applying paint to ensure the best results and a high-quality finish.
Remember, using the wrong paint or cutting corners by choosing low-cost alternatives can cause paint to crack, blister, or peel off the UPVC surface.
Prepping Your Workspace
Having a well-prepared workspace is indispensable for a smooth UPVC painting process. Start by using masking tape to protect the edges and glass of your windows and doors from paint splatters.
For added protection, consider using masking paper to efficiently cover door sills, beams and cornices and safeguard large areas from overspray.
In addition to masking off areas, make sure your workspace is well-ventilated to remove toxic fumes and odours from the paint, improve air quality, and reduce the risk of respiratory issues.
You can start painting your UPVC surfaces with a clean and organised workspace!
Proper Preparation Techniques for UPVC Surfaces
Ensuring that your UPVC surfaces are well-prepared before you commence painting is vital.
This includes cleaning and degreasing the surface, lightly sanding to improve paint adhesion, and applying a primer if necessary for exterior UPVC surfaces.
Correctly preparing the surface not only ensures a smooth and even paint job but also extends the life of your painted UPVC surfaces.
Skipping these essential steps can lead to paint bubbling or peeling, uneven coverage, and a less-than-perfect result. So, take the time to prepare your UPVC surfaces, and you’ll be rewarded with a stunning transformation.
Cleaning and Degreasing UPVC Doors and UPVC Window Frames
Cleaning and degreasing your UPVC surfaces is the initial preparation step for painting.
Dirt, grime, and grease can prevent the paint from adhering properly, leading to a less-than-ideal finish. To clean your UPVC surfaces, use a damp cloth and mild detergent to remove any stubborn stains or marks.
Once the surfaces are clean and free of dirt and grime, rinse them thoroughly with water to remove any soap residue, and allow them to dry completely before moving on to the next step.
A clean, grease-free surface is the foundation for a successful UPVC painting project, so don’t skimp on this crucial step.
Lightly Sanding
Once your UPVC surfaces are cleaned and degreased, lightly sand them using fine-grit sandpaper. This process will remove any glossy finish and create a slightly textured surface that helps the paint adhere better.
Be sure to sand all areas that will be painted to ensure consistent adhesion.
When sanding, take care to follow these safety precautions:
- Avoid generating excessive heat, as friction can release toxic chemicals in the form of dust.
- Wear protective gear, including gloves, eyewear, and a ventilated facemask that filters out dust and chemicals.
- Once you’ve completed the sanding process, wipe away any dust with a high-quality microfiber cloth.
Applying Primer to UPVC Doors
Even though it isn’t always required, a primer designed for UPVC doors and window surfaces can enhance paint adhesion and durability, particularly for exterior projects.
Products such as primers and undercoats are recommended for UPVC surfaces before painting.
When applying the primer, use a brush or roller to ensure an even coat, and allow it to dry according to the manufacturer’s instructions before applying the paint.
Properly primed surfaces will provide a solid foundation for your paint, reducing the risk of paint bubbling or peeling and ensuring a professional finish.
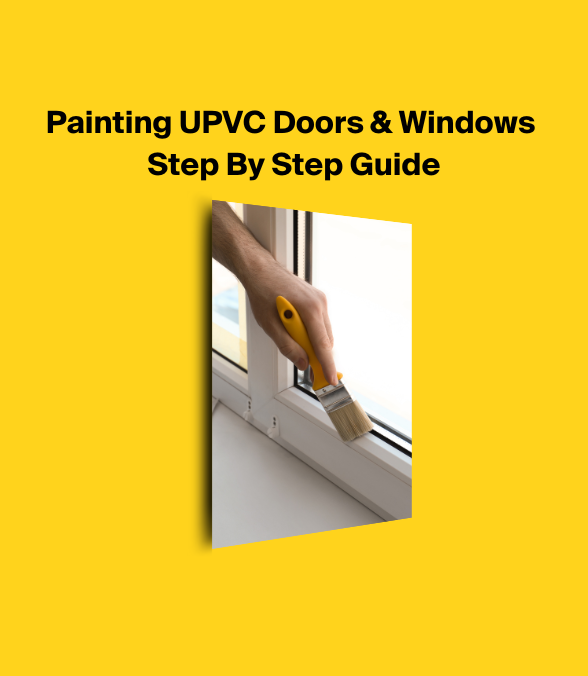
Step-by-Step Guide to Painting UPVC Doors and Windows
Once your UPVC door and windows or surfaces are ready, you can begin painting.
The key to a successful UPVC painting project is to apply multiple thin coats of paint, allowing each coat to dry before applying the next one. This will ensure full coverage and a smooth, even finish.
In the following sections, we will outline the steps for applying the first and second coats and allowing the paint to dry and cure.
By following these steps, you’ll be well on your way to achieving a professional finish that will transform your UPVC surfaces.
First Coat Application
The first coat of paint forms the basis for the final finish, so it's key to apply it evenly and carefully. Depending on your preference and the available tools, you can use a brush, roller, or spray paint to apply the paint.
Regardless of your chosen method, aim for a thin, even coat to ensure proper coverage and avoid brush marks.
When painting with a brush or roller, follow these steps for a smoother finish:
- Start from the inside of the frame and work your way towards the outside edge.
- This technique will help minimise the appearance of brush marks.
- Once the first coat is applied, allow it to dry completely before moving on to the second coat.
Second Coat Application
Once the first coat has dried, apply the second one to achieve full coverage and a smooth, uniform finish.
The second coat should be applied like the first, using a brush, roller, or spray.
Be patient and allow the paint to dry completely between the two coats, which will help prevent uneven coverage and potential paint issues later on.
The recommended waiting time between the first and second coats of paint on UPVC surfaces can vary based on the paint and manufacturer’s instructions.
Generally, it is advised to wait at least one to two hours for the first coat to dry before applying the second coat.
However, for the most accurate waiting time, check out the specific instructions provided by the paint manufacturer.
Drying and Curing Time
After the second coat of paint is applied, give the paint ample time to dry and cure completely before you start reassembling or using the painted UPVC surfaces.
Drying and curing times can vary based on the paint and environmental conditions, such as temperature and humidity.
To ensure the best results, follow the manufacturer’s instructions for drying and curing times. Typically, UPVC paint takes about 30 minutes to become touch dry and 8 hours to cure fully.
It is recommended not to touch painted surfaces for 24 hours.
Once the paint is fully cured, you can enjoy the beautiful transformation of your new UPVC front surfaces.
Do you have a composite door you want to paint? Read our guide on painting composite doors here.
Troubleshooting Common UPVC Painting Issues
You might still encounter some common UPVC painting problems despite meticulous preparation and application techniques.
This section will address paint bubbling, peeling, and uneven coverage and provide solutions for proper surface preparation and paint application.
By understanding the causes of these issues and taking the necessary steps to prevent them, you can ensure a flawless finish for your painted UPVC surfaces and keep them looking great for years.
Paint Bubbling or Peeling
Paint bubbling or peeling on UPVC surfaces can be frustrating, especially after all the time and effort you’ve put into painting.
One potential cause of this problem is moisture entrapment within the paint film or cracks, holes, and imperfections on the surface.
To avoid paint bubbling or peeling, appropriate surface preparation is required before painting. Here are some guidelines to follow:
- Clean the surface thoroughly to remove any dirt, grease, or debris.
- Sand the surface to create a smooth and even texture.
- Apply a primer to create a strong bond between the paint and the surface.
- Avoid applying the paint too thickly, as this can limit paint flexibility and contribute to cracking, bubbling, or blistering.
By following these guidelines, you can minimise the risk of paint bubbling or peeling and ensure a durable finish for your UPVC surfaces.
Uneven Coverage
Uneven paint coverage on UPVC surfaces can result from various factors, including poor surface preparation, applying the paint too thickly, and using improper techniques or equipment.
For a smooth and uniform paint finish, it’s important to apply several thin coats of paint the same way, letting each coat dry before the next application.
In addition to proper surface preparation and paint application techniques, high-quality brushes, rollers, or sprays can help prevent uneven coverage.
By taking these steps, you can ensure a professional finish that will make your painted UPVC surfaces the envy of the neighbourhood.
Maintenance Tips for Painted UPVC Surfaces
Regularly maintaining your already painted UPVC doors or windows and surfaces is critical to keep them looking good and extend their longevity.
Regular cleaning and performing touch-ups or repairs as needed will help to preserve the appearance and durability of your painted windows and doors.
In the following sections, we will provide practical tips for maintaining your painted UPVC surfaces, ensuring they look fresh and vibrant for years.
Regular Cleaning
Regular cleaning is vital to maintain the appearance of your painted UPVC surfaces.
Cleaning every three months is recommended for properties located in towns, cities, or near the coast, while those in rural areas with less dirt may only require cleaning every six months.
To clean your painted UPVC surfaces, use a damp cloth and mild detergent to wipe away dirt and grime gently.
Avoid using abrasive cleaners or harsh chemicals, which can damage the paint. Keeping your painted UPVC surfaces clean ensures they remain as stunning as the day you painted them.
Touch-ups and Repairs
Over time, wear and tear, weather, or accidents may cause chips, scratches, or other damage to your painted UPVC surfaces. To address these issues, clean the affected area and apply a touch-up coat of paint as needed.
When performing touch-ups or repairs, use the same paint and application method as the original paint job. This will help ensure a consistent appearance and prevent noticeable differences in colour or texture.
With regular maintenance and timely touch-ups, you can preserve the beauty and integrity of your painted UPVC surfaces for years to come.
Summary
In conclusion, painting UPVC surfaces can be a rewarding and cost-effective way to refresh the appearance of your home, increase its value, and extend the life of your windows and doors.
By properly preparing your surfaces, choosing the right paint, and following the appropriate application techniques, you can achieve a professional finish that will enhance the beauty of your property.
With the knowledge and guidance provided in this comprehensive guide, you can confidently tackle your UPVC painting project and transform your home into a stunning reflection of your personal style.
So, grab your brushes, rollers, or spray gun, and get ready to revamp your UPVC surfaces with ease!
Frequently Asked Questions
Is painting uPVC doors a good idea?
Painting UPVC doors is an option; however, it goes against the design of UPVC, which was meant to be low-maintenance and resistant to elements.
It may give a quick refreshing aesthetic but should not be done for long-term solutions.
Does uPVC paint need primer?
No primer is required when applying paint to uPVC, making Dulux Weathershield Multi-Surface paint a great choice for directly painting doors and other hard-to-reach areas.
This paint guarantees six years of weather protection, so your uPVC door will look great for longer.
Does uPVC paint peel off?
Correct preparation is essential to ensure that the paint bonds properly to a uPVC/PVC or plastic surface; otherwise, it will peel off once dry.
What type of paint should I use for UPVC surfaces?
For UPVC surfaces, opt for UPVC-specific paints or exterior paints that offer UV/solar protection and adhere well to the plastic surfaces.
How many coats of paint should I apply to UPVC surfaces?
Applying two to three coats of paint for optimal results on UPVC surfaces is recommended.